Wednesday 27 October 2010

Grand Designs (episode 2)

A quick post just to show the latest progress.  


The plaster is on the walls and is slowly drying. The air vents are unblocked, joists treated, and half of the new sub-floor is down.


Poor light + dark walls + dust = poor quality pics


Sunday 24 October 2010

Grand Designs (episode 1)

This post's a bit of an epic!


We both knew the house needed a lot of remedial work which we wanted done before moving in. We also wanted some cosmetic work carried out too.


This is what she looked like when we moved in. I've copied the first two pictures from the estate agent's sale brochure so the quality has somewhat deteriorated.


Living room.
Dining room.

Dining room (back to the window) looking towards living room wall.
If you look closely you can see rising damp on the walls.
To see what might be causing the damp we needed to get under the floor.
Here you can see black mould on the chipboard -
flooring and green/yellow mould on the laminate underlay.

We wanted to knock the living and dining room through.


Deb, in the company of rising damp.
Living room - on the right, 1 meter of plaster removed in
prep for the DPC (damp-proof course)
Knock through (take 1) .

We wanted the living room fireplace returned to its former glory too.


To our frustration the knock through was too narrow. So we had it extended by another foot or so which has made all the difference.


Knock through (take 2).
We also wanted to open up the dining room further, so decided to replace the rear window with French doors.


Before doors...
...and after


It was now time for the DPC to go in. If you're not familiar with the process, lots of holes drilled at mainly floor level, internally and externally, then injected with 'something' to form a water resistant barrier which should, prevent moister rising up from the foundations. 


The most recent update is that the knock through and fireplace have been 'boxed off' and the cement has gone down before the plaster skim coat.


Oh yeah, there's a cement mixer in our living room! We thought it would make a lovely feature and a great toy for the baby to play with.


I'll keep you posted with further updates in due course, that's more than enough for now. Thanks for your patience.

Saturday 23 October 2010

"Underlay! Underlay! Ariba! Ariba!"

Several loose floorboards nailed down securely and the carpet fitter arrives on time. He sounded just like Bryan Jones (not to be mistaken for the Brian Jonestown Massacre). 


I'm asked, "how do you want the carpet fitted around the banister spindles?" (on the landing). My reponse, "fitted to the floor please". It didn't go down too well with the bloke. What kind of answer was he expecting from me though?! He's the professional! 


After much discussion with Deb, Helen, and input from Steve, the decision was made and advice from the expert followed. The carpet will stop at the spindles folded under itself instead of being cut and nailed around them. I was afraid it would look rubbish, but it's ok thankfully. 


2 1/2 hours and a tea and coffee later, the fitter left Strathcona. I could now carry on with the job in hand, covering the stairs and landing with plastic dust sheets to protect the carpet from builders' boots, plaster and varnish scrapings. Job's a good'un! 


Baby's room


Dust sheets and carpet/underlay in place.

If you look to the far right in the living room, you can see newly applied cement.
More on that in my next post.


By the way, new addition to the ever increasing tool family I'm acquiring...a stanley knife!

Friday 22 October 2010

To strip or not to strip...

I foolishly decided to strip/sand the entire banister in the house and naively thought - time scale, "one weekend tops, easy!".


Approx 26 hours in, with the aid of some manly men folk (Ste B, Steve and John K), I'm about half way through. 


So far I've borrowed a paint stripper heat gun and a heavy duty extension cable from my Dad's private tool hire company. I've already blown the extension cable, in fact, set it on fire from over heating! Sorry Dad. 


I've also bought:
another heat gun for double the effectiveness
various scrapers
Nitromors  
Black and Decker Mouse sander (more to follow on this tiny beauty)
a new extension cable


Some before and afters pics for your perusal.


Carpets going down this weekend!

Monday 18 October 2010

New for old

I'm sure you'll be bored of my endless posts about our new home ('improvements'), but I have to de-stress somehow. I hope by sharing the load I'll be able to sleep a bit better as time goes on. Vampires look cool with red eyes, I just look really tired!


This post begins, well, at the beginning really. The house had just been bought and the dread set in...what the hell have we done?! I'll touch on that in a lot more detail on a later post.


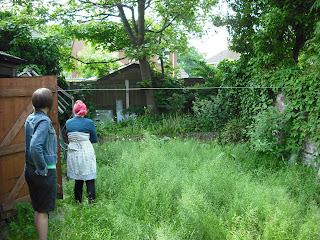
I took the following pics on our (me and Deb) 1st viewing of the house. Helen came along to provide moral support. I've only included photos of the garden at this point as that was the 1st 'big reveal'.

Helen & Deb


 With a lot of help from Aud & Les (my folks), in about 15 hours of hard slog over one weekend, the garden was magically transformed...to a much more manageable garden! To be fair to my folks, they did the majority of the work. I tended to walk about the place generally stressing and shaking my head still thinking, what the hell have we done!? I couldn't even make a decent cup of tea which was agreeable to the parents.


Thanks to the Queen & King for all their hard work, I had a ball that weekend.


Drum roll please...


RoboLes


My Dad, quite literally, stumbled over a beehive, buried underground.


I've not got a more recent photo of the garden, there have been further improvements, but you get the idea.


Till next time!